Introduction
Faworki, also known as chruściki or Polish angel wings, are crispy, delicate pastries that melt in your mouth. Traditionally made for Fat Thursday (Tłusty Czwartek) and other celebrations, these golden treats are deep-fried to perfection and dusted with a generous layer of icing sugar.
This traditional Polish faworki recipe brings back the taste of my childhood. I remember watching my babcia roll the dough paper-thin, beating it with a rolling pin to make it extra airy. The kitchen would fill with the scent of frying dough, and I couldn’t wait for that first, sweet bite.
Making homemade faworki might seem like a labor of love, but with the right technique, they turn out light, crisp, and perfect every time. Follow this step-by-step chruściki recipe, and you’ll have authentic Polish faworki just like the ones from Polish bakeries.
➡️ Explore more Polish Recipes
“As an Amazon Associate I earn from qualifying purchases.”

How to Make Polish Faworki from Scratch (Step-by-Step Guide)
1. Prepare the Dough – The Foundation of Crispy Faworki
In a large bowl, mix flour, sugar, and salt. These dry ingredients form the base, so give them a quick whisk to distribute everything evenly.
- Add egg yolks, sour cream, vanilla extract, and vodka. The egg yolks enrich the dough, while sour cream adds a slight tang and softness.
- Pour in the melted butter—this gives a subtle richness without making the dough heavy.
- Start kneading. It might feel firm and slightly dry at first, but keep working it. After about 10 minutes of kneading, the dough should be smooth and elastic. You can use a standing mixer for this as well.
- Wrap it in cling film and let it rest for 30 minutes at room temperature. This is essential! Resting allows the gluten to relax, making the dough easier to roll out super thin later on.


2. Beat the Dough – The Secret to Airy, Light Faworki
This step is often skipped in modern recipes, but it makes a big difference!
- Take a rolling pin and beat the dough for about 5 minutes. Yes, really—just whack it a few times, then fold and repeat.
- Why do we do this? It incorporates air pockets and breaks down gluten even more, making the final faworki light and crispy instead of dense.
- This trick was something I learned from my babcia—she never skipped it, and her faworki were always perfectly delicate and full of tiny bubbles.
3. Roll & Cut the Dough – The Thinner, the Better
Now comes the most important part—rolling the dough as thin as possible.
- Lightly flour your surface and rolling pin. The dough shouldn’t stick, but don’t use too much flour or it will absorb into the dough and make it tougher.
- Roll the dough paper-thin—we’re talking almost translucent. If you think it’s thin enough, roll it a little more. The thinner it is, the crispier the final faworki!
- Use a pastry cutter or sharp knife to cut the dough into 2.5 cm x 10 cm (1 inch x 4 inches) strips.
- Make a small slit in the center of each strip and pull one end through the hole to create the classic twisted shape.
At this point, you can let them sit for a few minutes while heating the oil—this helps them hold their shape better when frying.


4. Fry to Perfection – Golden, Not Greasy
This is where the magic happens. The key to perfect faworki is the right oil temperature and frying in small batches.
Use a slotted spoon or tongs to remove them and drain on paper towels to absorb excess oil.
- Heat oil to 175°C (347°F) in a deep frying pan. If you don’t have a thermometer, test with a small piece of dough—it should bubble immediately and float to the top.
- Fry in small batches so the oil temperature doesn’t drop. If the oil is too cool, the faworki will soak up oil and become greasy instead of crisp.
- Fry for about 30-40 seconds per side, flipping once, until golden and puffed. They should be light and airy with small bubbles on the surface.
5. Dust with Icing Sugar & Serve
Now for the final touch—a generous dusting of icing sugar.
- Serve immediately—faworki are at their crispiest and best on the first day!
- Wait until they’ve cooled slightly before sifting over icing sugar. If you do it too soon, the sugar will melt into the faworki instead of creating that signature white dusting.
Bonus Tips from My Babcia’s Kitchen
✅ Why add vodka? – It evaporates quickly while frying, making the faworki crispier and less greasy. No, you won’t taste it!
✅ Rolling thin is key – If you don’t roll it thin enough, the faworki will be thick and doughy instead of light and delicate.
✅ Use neutral oil – Sunflower or vegetable oil works best. Avoid olive oil, as it can make them heavy and give an unwanted flavor.
✅ Best eaten fresh – After a day, they lose their crispness. If you have leftovers, pop them in a warm oven for a few minutes to revive their crunch.
Why You Should Add Vodka to Faworki Dough (Crispiness Explained!)
When making traditional Polish Faworki (Chruściki), one of the secret ingredients often found in old-school recipes is vodka. At first glance, it might seem unnecessary—after all, it’s not a flavoring, and it’s not enough to make the pastries taste alcoholic.
So why do we add vodka to faworki dough? The answer lies in science and technique—it helps create the crispiest, lightest, and most delicate faworki possible. Let’s break it down.
1. Vodka Evaporates Faster Than Water
Unlike water, vodka has a lower boiling point (around 78°C compared to water’s 100°C). When faworki hit the hot oil, the vodka evaporates almost instantly, causing the dough to puff up quickly and create tiny air pockets inside.
What does this mean for your faworki?
✅ Lighter texture – The rapid evaporation helps create that signature airy crispiness instead of a dense, heavy bite.
✅ More bubbles on the surface – Traditional faworki have tiny blistered bubbles that make them even more delicate and crunchy.
✅ No extra moisture – Since vodka evaporates so fast, the dough doesn’t absorb as much oil, keeping the faworki crisp, not greasy.
2. It Reduces Gluten Development (Making the Dough Easier to Work With)
When making pastry, too much gluten can lead to tough, chewy results—something we absolutely don’t want in faworki.
Gluten develops when flour meets water and is worked through kneading. However, vodka doesn’t form gluten in the same way water does. This means:
✅ The dough remains soft and pliable, making it easier to roll paper-thin.
✅ It’s less elastic, so it doesn’t shrink back when rolled out.
✅ The final faworki are crisp and delicate, rather than tough or doughy.
3. Vodka Prevents the Dough from Absorbing Too Much Oil
If faworki absorb too much oil, they become greasy and heavy rather than crisp and light.
Since vodka evaporates faster than water, it leaves behind less moisture in the dough, which means:
✅ Less oil absorption – The faworki fry quickly and evenly.
✅ Longer-lasting crispiness – They stay crunchy for longer instead of turning soft.
4. Will You Taste the Vodka?
No! The vodka burns off completely during frying, so it doesn’t leave any alcohol flavor in the final product.
This means kids and non-drinkers can enjoy faworki worry-free—all you’re left with is an extra-crispy, airy pastry.
5. Can You Substitute Vodka?
If you don’t want to use vodka, you can replace it with another high-proof alcohol like:
- Spiritus (Polish rectified spirit, diluted to 40%) – Traditional and highly effective.
- Rum or brandy – Adds a mild flavor, but still helps with crispiness.
Non-Alcoholic Substitutes:
While nothing works quite like alcohol, you can use:
- White vinegar – Helps with crispiness but may add a slight tang.
- Lemon juice – Also adds acidity to tenderize the dough.
- Extra sour cream – Makes the dough softer, but won’t have the same crisping effect.
Note: If replacing vodka, your faworki may not be as light and crispy, but they will still taste great!
Printable Recipe Card for Faworki:

Polish Faworki (Chruściki Recipe) – Light & Crispy
Equipment:
- Rolling Pin – To roll the dough paper-thin for the crispiest faworki.
- Slotted Spoon or Tongs – For flipping and removing faworki from the hot oil.
- Small Fryer or a pan – To fry the faworki; a heavy-bottomed pan works best for even heating.
- Cooking thermometer – To maintain the oil temperature at 175°C.
- Stand mixer with dough hook – If you prefer not to knead by hand.
Ingredients:
Ingredients (Makes about 40 faworki)
- 250 g plain flour - plus extra for dusting
- 4 egg yolks
- 25 g unsalted butter - melted and cooled
- 50 g sour cream
- 1 tbsp sugar
- 1 tbsp vodka or spirit - optional, helps with crispiness
- 1 tsp vanilla extract
- ½ tsp salt
- Oil for frying - sunflower or vegetable oil
- Icing sugar for dusting
Instructions:
Prepare the Dough
- 1. In a large bowl, mix flour, sugar, and salt.2. Add egg yolks, sour cream, vanilla extract, and vodka.3. Pour in the melted butter and knead until the dough becomes smooth and elastic (about 10 minutes).4. Wrap in cling film and let it rest for 30 minutes at room temperature.
Beat the Dough for Airiness
- After the dough has rested for 30 minutes, take a rolling pin and beat the dough for about 5 minutes.This step incorporates air, helping the faworki turn out light and crispy.
Roll & Cut the Dough
- 1. Roll the dough on a floured surface until it’s paper-thin (the thinner, the better).2. Using a knife or pastry cutter, cut into 2.5 cm x 10 cm strips.3. Make a small slit in the center of each strip and pull one end through to create a twisted shape.
Fry Faworki
- 1. Heat oil to 175°C (347°F) in a deep pan.2. Fry the faworki in small batches, turning them until they’re golden and puffed (30-40 seconds per side).3. Remove and drain on paper towels.
Dust & Serve
- Once slightly cooled, dust generously with icing sugar. Enjoy them fresh and crispy!
Notes:
Tips for the Best Faworki
- Why add vodka? It evaporates quickly, helping the faworki stay crispy and absorb less oil.
- Roll it thin—the thinner the dough, the lighter the faworki.
- Keep the oil at a steady temperature—too hot, and they’ll burn; too cold, and they’ll soak up oil.
- Eat fresh—they’re best on the day they’re made!
Storage
- Store in an airtight container at room temperature.
- They stay crisp for 1-2 days but are best enjoyed immediately.
- Avoid refrigeration, as it makes them soft.
Nutrition:
👉 Traditional Polish Fat Thursday Desserts You Must Try
In Poland, Fat Thursday (Tłusty Czwartek) is one of the most delicious days of the year. Celebrated on the last Thursday before Lent, it’s a day when calories don’t count, and indulging in deep-fried, sugar-dusted, and cream-filled treats is practically a rule!
Bakeries overflow with Polish doughnuts (pączki) and crispy faworki (chruściki), but these aren’t the only sweets enjoyed on this special day. If you want to celebrate Fat Thursday like a true Pole, here are the must-try traditional Polish desserts you need on your table.
1. Pączki – The Iconic Polish Doughnut 🍩
The King of Fat Thursday
If there’s one dessert that defines Tłusty Czwartek, it’s pączki—Polish-style doughnuts that are soft, fluffy, and filled with delicious fillings like rose jam, custard, or plum butter.
Unlike regular doughnuts, pączki are enriched with egg yolks, milk, and butter, making them incredibly soft and rich. They are fried until golden and then glazed or dusted with powdered sugar.
Try this: Authentic Polish Pączki Recipe
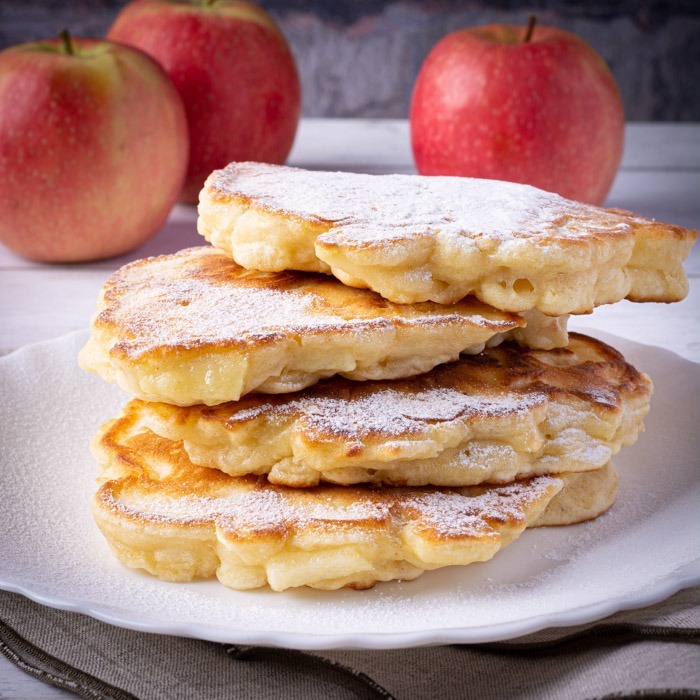
2. Racuchy – Polish Yeasted Apple Fritters 🍏
A Rustic, Home-Style Treat
For those who love fruit-filled desserts, racuchy (Polish apple fritters) are a must-try. These small, fluffy pancakes are made with yeast batter and stuffed with apple slices, then fried until golden.
Try this: Polish Racuchy Recipe

A Few Words from the Chef
For me, Fat Thursday is more than just a day of indulgence—it’s a taste of my childhood. I remember waking up to the smell of freshly fried pączki and faworki filling the kitchen, with my babcia rolling the dough, dusting pastries with sugar, and making sure we all had more than enough to eat.
In Poland, this day is a celebration of tradition, family, and food. No one worries about calories, and the goal is simple: enjoy as many sweets as possible before Lent begins. Whether it’s the fluffy, jam-filled pączki, the delicate, crispy faworki, or a plate of apple-filled racuchy, each bite brings back memories of home.
Now, as a chef, I love keeping these traditions alive—not just in my own kitchen, but by sharing these authentic Polish recipes with you. My goal is to help you recreate these classics at home, no matter where in the world you are. So go ahead, whip up a batch of faworki, fry some golden pączki, and celebrate Fat Thursday the Polish way!
If you try any of these recipes, I’d love to hear about it—leave a comment and let me know how they turned out! Smacznego! 😊
Follow my Culinary Journey
Discover more from Chefs Binge
Subscribe to get the latest posts sent to your email.
I have used a vodka and they come out nicely, I used vanilla bean paste instead. Thanks
This worked exactly as written, thanks! My dough wasn’t as elastic. I added a bit of water and did not roll in more flour. I weighed all exactly. My husband loved them!!!